目前我所知道的版本有
1. Google Code
2. DroidDraw
星期二, 6月 22, 2010
星期六, 6月 19, 2010
Eclipse 安裝 Android
官網
Eclipse 3.5 (Galileo) 的安裝方式,3.4的安裝可以見官方說明
1. Start Eclipse, then select Help > Install New Software.
2. In the Available Software dialog, click Add....
3. In the Add Site dialog that appears, enter a name for the remote site (for example, "Android Plugin") in the "Name" field.
In the "Location" field, enter this URL:
https://dl-ssl.google.com/android/eclipse/
Note: If you have trouble acquiring the plugin, you can try using "http" in the URL, instead of "https" (https is preferred for security reasons).
Click OK.
4. Back in the Available Software view, you should now see "Developer Tools" added to the list. Select the checkbox next to Developer Tools, which will automatically select the nested tools Android DDMS and Android Development Tools. Click Next.
5. In the resulting Install Details dialog, the Android DDMS and Android Development Tools features are listed. Click Next to read and accept the license agreement and install any dependencies, then click Finish.
6. Restart Eclipse.
星期六, 6月 12, 2010
blog 顯示語法設定
1. 打開後台開啟 設計 / 修改 html
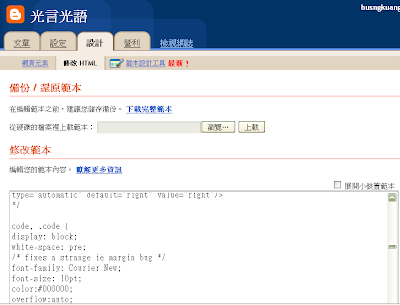
2. 將以下內容插入 CSS設定內容中
3. 完成以上步驟後,在想要顯示的段落中加入
<code>
(1)取代HTML標籤語法將以下三個符號取代為:
< 取代為< 、>取代為>、& 取代為&
(2)<code>
想要加入的內容...
</code>
CSS 的 white-space有三種屬性可以設定
1預設值normal:
會把空白、Tab或是換行都替換成一個半形的空白,並且文章太長時而超出區塊範圍的話,也會自動換行
2、nowrap:
一樣會把空白、Tab或是換行都替換成一個半形的空白,這是讓文章過長也不會自動換行的屬性
3、pre:
會正常顯示出空白、Tab與換行的樣式

2. 將以下內容插入 CSS設定內容中
/* Blogger版 */
.post code {
  white-space: pre;
  display: block;   /* 指定元素顯示的形式 與區塊元素相同:block */
  overflow:auto;  /* 超出顯示範圍處理 全部顯示:visible 隱藏:hidden 捲軸:scroll 瀏覽器自動選擇:auto */
  color:#ffffff;
  font-family: Arial,Courier New; /* 文字字型 */
  font-size: 10pt;   /* 字型大小 */
  line-height: 10px; /* 文字段落行高 */
  padding: 10px 10px 10px 21px; /* 內距綜合設定 依序為上右下左 */
  margin: 5px 20px 5px 20px ; /* 邊界綜合設定 依序為上右下左 */
  border: 1px dashed #ccc; /* 框線綜合設定 依序為粗細 線類 顏色 */
   /*背景設定 依序為 背景色碼 背景圖URL*/
  background: #f0f0f0 url(https://blogger.googleusercontent.com/img/b/R29vZ2xl/AVvXsEj5WvIBYayDEyXt7nN-dmpTEjmUON3LhZjupOqzHK16OBrWJc5-eDf_r_PlvthAKl7cqlMUkvNBFQgjlsq1KxAx2PL6Ui6pnthgOB8pMFAwqgFm6Th8ZI5TdCuf-eynRWcnVYPZ9A/) left top repeat-y;

}


/* Pixnet版 */
code {
  white-space: pre;
  display: block; /* 指定元素顯示的形式 與區塊元素相同:block */
  overflow:auto; /* 超出顯示範圍處理 全部顯示:visible 隱藏:hidden 捲軸:scroll 瀏覽器自動選擇:auto */
  font-family: Arial,Courier New; /* 文字字型 */
  font-size: 10pt; /* 字型大小 */
  line-height: 15px; /* 文字段落行高 */
  padding: 10px 10px 10px 21px; /* 內距綜合設定 依序為上右下左 */
  margin: 5px 40px 5px 40px ; /* 邊界綜合設定 依序為上右下左 */
  border: 1px dashed #ccc; /* 框線綜合設定 依序為粗細 線類 顏色 */
  background: #f0f0f0 url(https://blogger.googleusercontent.com/img/b/R29vZ2xl/AVvXsEj5WvIBYayDEyXt7nN-dmpTEjmUON3LhZjupOqzHK16OBrWJc5-eDf_r_PlvthAKl7cqlMUkvNBFQgjlsq1KxAx2PL6Ui6pnthgOB8pMFAwqgFm6Th8ZI5TdCuf-eynRWcnVYPZ9A/) left top repeat-y; /*背景設定 依序為 背景色碼 背景圖URL*/
  //max-height:400px;
}
3. 完成以上步驟後,在想要顯示的段落中加入
<code>
(1)取代HTML標籤語法將以下三個符號取代為:
< 取代為< 、>取代為>、& 取代為&
(2)<code>
想要加入的內容...
</code>
CSS 的 white-space有三種屬性可以設定
1預設值normal:
會把空白、Tab或是換行都替換成一個半形的空白,並且文章太長時而超出區塊範圍的話,也會自動換行
2、nowrap:
一樣會把空白、Tab或是換行都替換成一個半形的空白,這是讓文章過長也不會自動換行的屬性
3、pre:
會正常顯示出空白、Tab與換行的樣式
訂閱:
文章 (Atom)